
Shoppers can now preview alternate styles - such as colors or finishes - by simply hovering over variation thumbnails on product tiles and item pages, making it easier to discover the right look without extra clicks.

Prerequisites:
- WordPress integration is set up and syncing with your account (Settings -> WordPress).
- Permission to edit inventory and images.
- Each item has at least two images uploaded (primary plus at least one alternate).
- Recommended image guideline: 750×750 px or larger; use consistent aspect ratios across images for the same item.
- Prepare your item images
- Go to Settings -> Inventory.
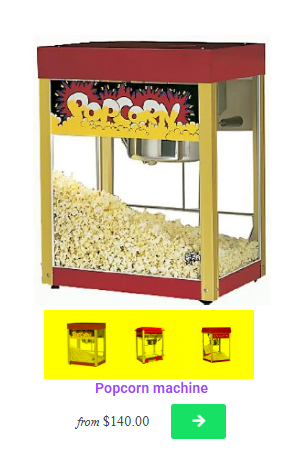
- Open an inventory item that has multiple styles/finishes, such as different color tents or chairs.
- In the Images section, upload additional images (e.g., black, white, natural finish).
- Arrange image order, primary image first (default view).
- Place your preferred alternate image next in the sequence (used on hover).
- Click Save.
- Allow your WordPress sync to run (typically 5–10 minutes) or use Sync All in Settings -> WordPress.
- Visit a category page and hover over an item tile to preview the alternate image.
- Open an item page and hover over the main image/thumbnail to preview additional images.
- Ensure all images for an item use the same aspect ratio to prevent layout shifts.
• Reorder the gallery if the wrong image appears on hover (move the desired hover image directly after the primary).
• Repeat for any other items with multiple finishes. - Per-section or per-item opt-out (CSS): A unique wrapper class is included for the hover preview. You can disable the effect for specific sections/items by adding a CSS override in your theme or Elementor’s Custom CSS. Example approaches:
• Target the wrapper and keep the default image static (disable swap).
• Limit the hover effect to selected grids or pages only.
• Site-wide opt-out (CSS): Apply your override at the theme or site level to disable the effect everywhere.
• Image order control: The hover preview uses the next gallery image after the primary. Reorder images to control which version appears on hover.
• Touch devices: On touchscreens (no hover), the default image displays until the item page is opened. - The hover preview isn’t showing:
Confirm the item has at least two images.
Wait for WordPress sync (or run Sync All).
Clear your browser cache and any site caching plugins.
Make sure no custom CSS is disabling the hover effect.
Test on a desktop device; touch devices do not trigger hover. - The wrong image shows on hover:
Reorder images so the preferred alternate image is immediately after the primary. - The layout jumps when hovering:
Use consistent aspect ratios and similar dimensions for all images in the item’s gallery. - Can I disable this for certain pages/sections?
Yes. Use CSS to target the feature’s wrapper class in those sections only. If using Elementor, place overrides in the widget’s Custom CSS area. - Does this change product info or links?
No. It only swaps the displayed image on hover. Product titles, links, and alt text remain unchanged.
Step-by-Step Instructions
Sync and review on your site
Fine-tune presentation
Feature Options & Parameters
Setting Up in WordPress
To set this up in WordPress, go to Websites -> Admin Login, on the left hand menu within your WordPress Dashboard, select InflatableOffice -> Setup, under "Item Page Settings:," you'll want to tick off "Show Additional Images on Category Pages" for these additional images to display.

Use Cases
Multi-finish products (e.g., event bars available in black/white/natural) shown as a single product with hover-to-preview.
• Alternate angles or detailed close-ups for quick scanning without leaving the category page.
Troubleshooting & FAQs