
Customizing the Menu
The navigation menu is the main way your customers will navigate your website. As you are setting up your website, it is important to think about what you want your customers to see the most. Adding specific links to your menu that direct them to a product or category will make it easier for your customers to navigate your website and products.
To Access your Menu Settings:
- Login to your WordPress site
- Go to the WordPress dashboard
- Go to Appearance -> Menus on the left side panel
To Add Items to your Menu:
You can find all of your pages in the "Pages" tab. You can find the pages that you want to add with the "View all tab or the "Search" tab.
If you want to add an outside link to your menu or you can't find the page you are looking for, you can use the "Custom Links" Tab.
Once you find the page:
1. Select the page you want to add by clicking on the box
2. Click "Add to Menu
3. Save changes

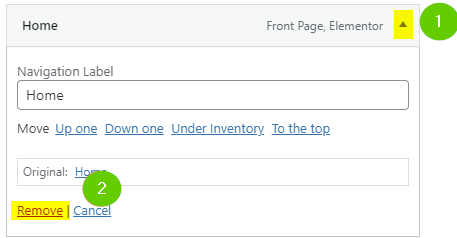
Once your page is added to the menu, it will show at the bottom of the list. To move the menu item simply click and drag it to your desired location.
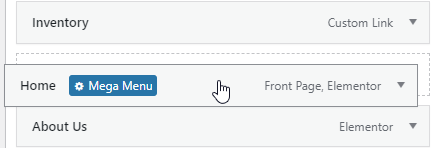
To Remove Items from your Menu:
- Open the menu item tab by clicking the arrow
- Click "Remove"
- Save changes
Video Demonstration
Troubleshooting
If changes are not showing, refer to this article.
Or you have to change the correct menu to edit:
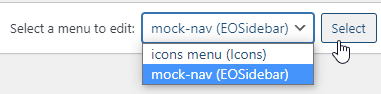
- mock-nav: for menu items without icons
- icons menu: for menu items with icons