
This method allows you to create and manage a second website without requiring a second location. Instead, you can add an additional website for $10 per month and use duplicated page templates to customize it as needed. If you need help getting started with adding a second website, please reach out to your sales representative or contact support@inflatableoffice.com for assistance. Follow the steps below to configure duplicated templates, link them to a new website, and assign inventory items to specific websites.
Step 1: Generate Your Second Website
Follow the steps outlined in this article to select a theme and generate your second website. After completing this process, please contact your sales representative or reach out to support@inflatableoffice.com to upgrade your subscription and finalize the launch of your second website.
Step 2: Create a New Page Group
Start by navigating to Settings → Document Center → Pages.
Click the dropdown arrow next to Add Pages and select Add Page Group.
In the Page Group to Copy field, select your existing page group you want to duplicate. Then, enter a name for the new page group in the New Page Name field. This will create a new set of page templates copied from the original page group, which you can customize as needed.
Once the new page group is created, you can update its associated templates.
Go to Settings → Document Center → Contract Templates and Invoice Templates, and edit the templates linked to the new page group to ensure they reflect the correct branding and details for your second website.
Step 3: Link the New Website to the Page Group
Next, connect the new website to the page group.
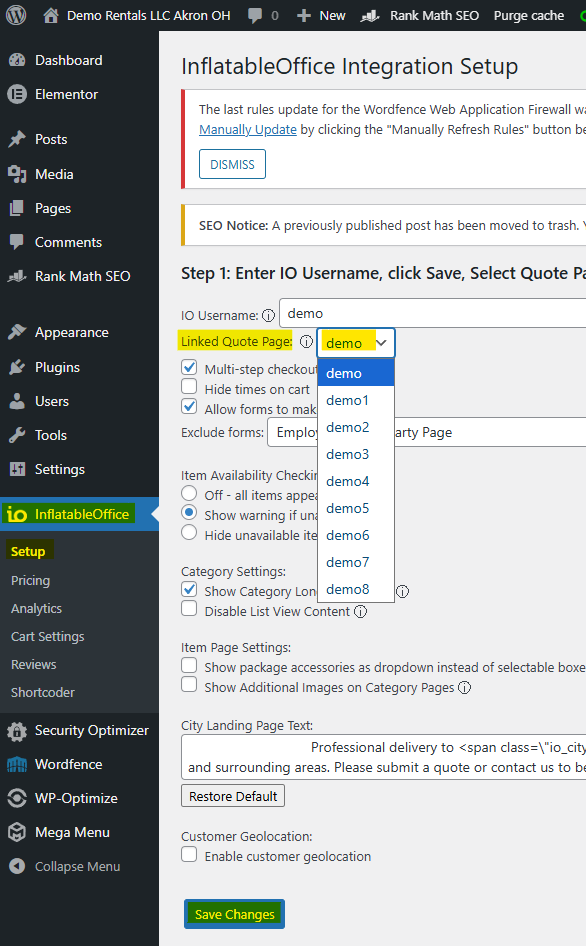
Navigate to Websites, select Admin Login for the new website, and access the WordPress dashboard. From the left-hand menu, click Inflatable Office → Setup.
On the setup page, find the Linked Quote Page option and select the newly created page group.
Step 4: Assign Items to the New Website
Finally, assign inventory items to the new website.
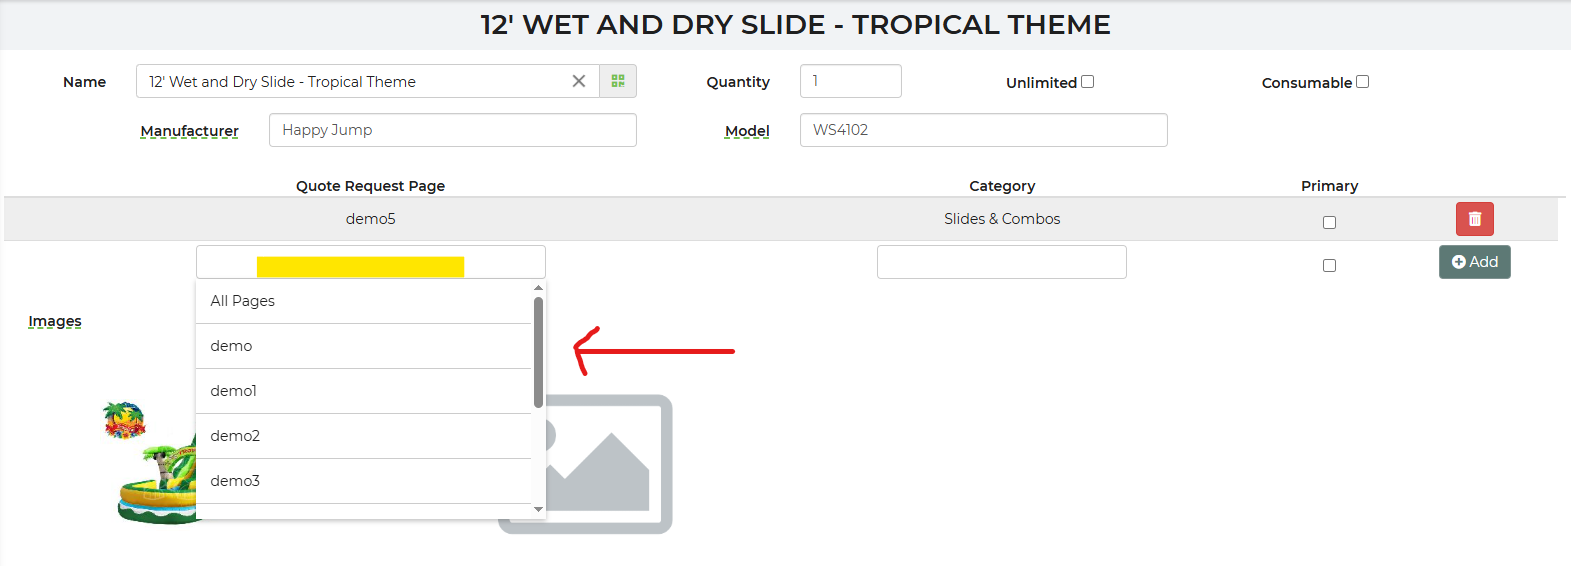
Open each item in your inventory and edit its category. Update the Quote Request Page (Website) the item will show in field to reflect the new website, as needed.
Once these steps are complete, the new page group and website will be fully configured and ready for use.