Share your Inventory with Others
You can share your inventory with another company to use as subcontractor through the software. There are serious advantages to doing this. Primarily, you can see immediate availability. There are 2 ways to do this. One is by editing an item and navigating to the Advanced section. If you choose Entire IO Universe, the item will be available to anyone using our software. If you choose specific companies, you must type in the name of the company as they have it entered in their account. As you type, we will search and show options.

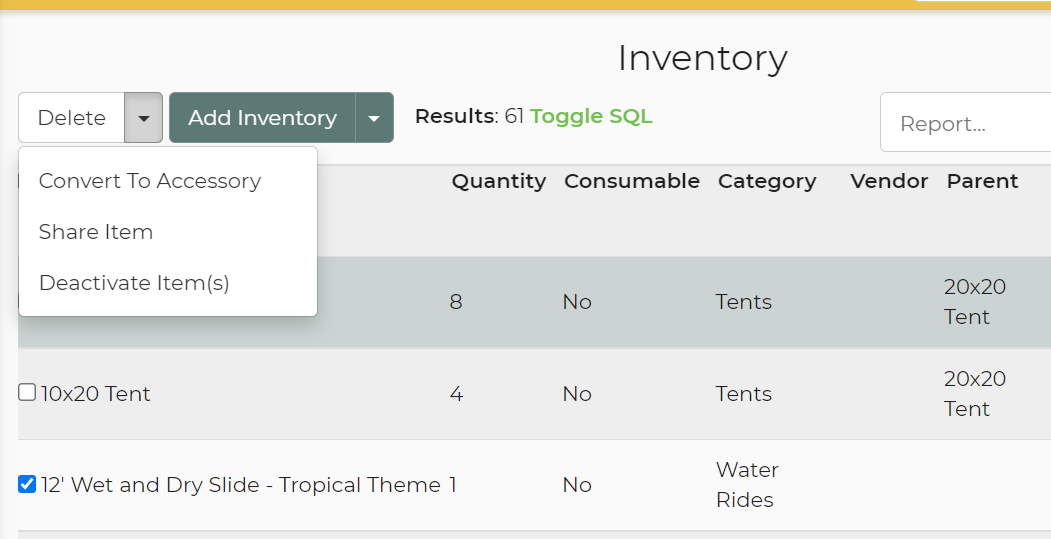
The other way to do this, and faster way if you are sharing many items, is to go to Settings -> Inventory, and in list view, select the checkbox for the items you want share. Sharing this way is faster, but it doesn't give you the option to share only with specific companies. If you want all of your inventory shared on the list you are viewing, you can click the checkbox in the header at the top of table.

You will need to do this for each page of inventory or raise the "Items per page" before selecting the Name button.
Once you've selected the items you want to share, you'll need to click "the Share Item" from the drop down and select.

Once you've shared your inventory other IO users will be able to go to Settings -> Vendors and if you are within the Available Vendors mile radius they'll be able to add you as a vendor.
If you have the alert Vendor: Item Shared turned on in the Alerts Center, you will get an email anytime someone shares an item specifically with your company.
If you make an item inactive that you are sharing, we will prevent others from adding it to their inventory. Anyone currently sharing that item will receive an email informing them that you may no longer have that item.
If you disable sharing of an item, it's availability will always show zero for those that were sharing the item with you.
Add Shared Inventory to Your Account
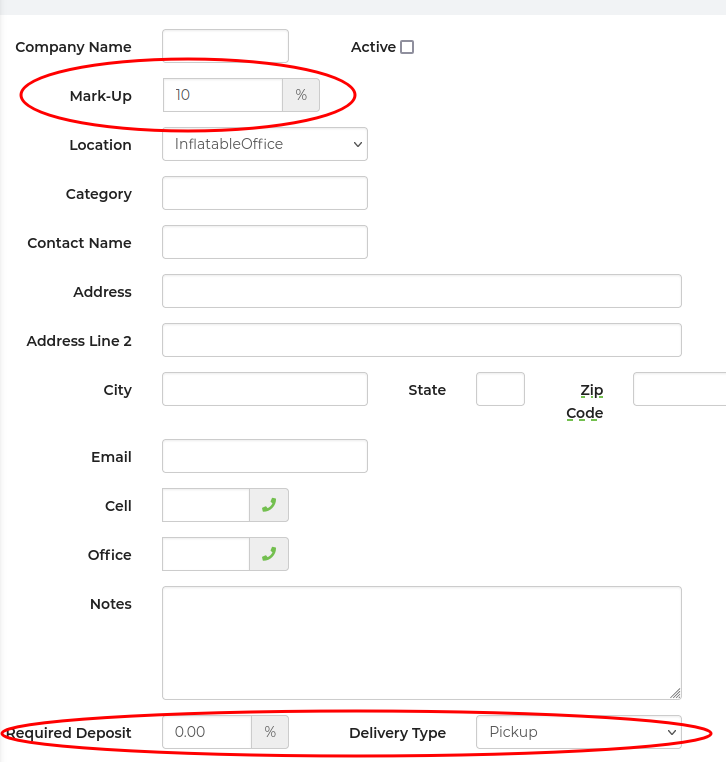
Go to Settings -> Vendors and search for nearby companies. Check the box next to them and click to add them as a vendor in your account. You can set a markup amount on each vendor to have the system calculate their price plus the markup so you are making some money on those items. Additionally you should set a default deposit requirement for the vendor as well as the delivery type. This will allow us to properly create quotes in the vendor's account.

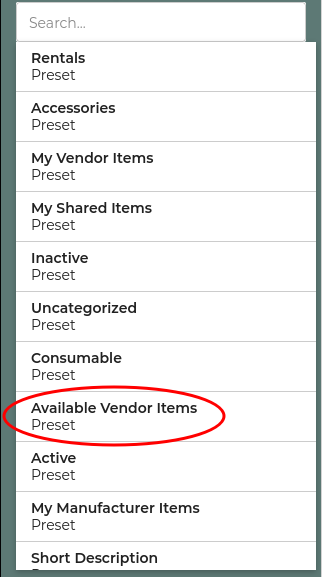
Next, access their shared items by going to your Inventory list page and choosing "Available Vendor Items". You should see all items that you are currently not sharing but are available to you from the vendors you have added.

You can also navigate to the vendor and click the link shown below to quickly see the items available to you.

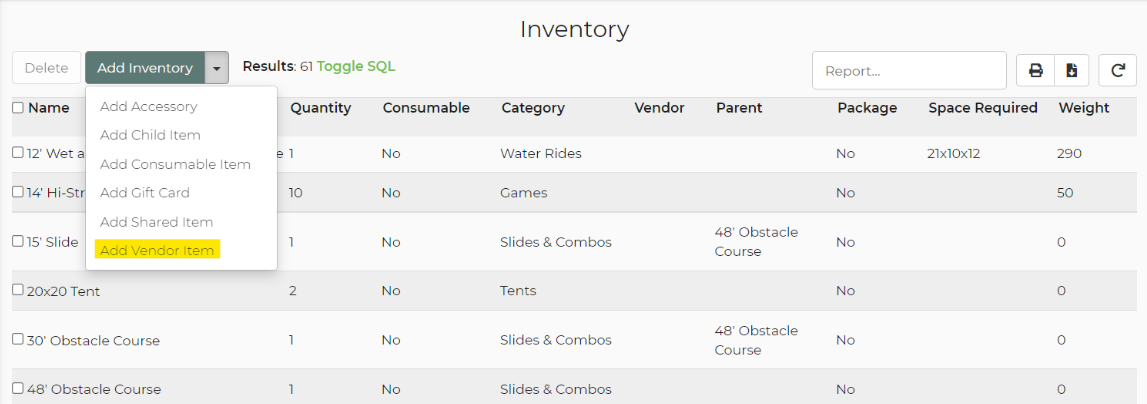
You'll see a list of the shared items from your Vendors. To add these items to your account as vendor items you'll need to select the items you want, then click the "add rentals" button at the bottom of the table.

If you want all of your inventory shared on the list you are viewing, you can click the checkbox in the header at the top of table.
Linked Items
Once you choose to use a shared item, we create a copy of that item in your account and link it to the original. We call these linked items sometimes. If you do not edit the pricing for these vendor items, then the price will continue to be linked to the vendors account and will be adjusted accordingly. You can mark-up all prices from a vendor by editing that Vendor's markup %.
If, however, you adjust the prices of items that have been shared with you, then the prices will no longer be linked and if they change that item's price, it will no longer adjust on your account. To learn more about unlinking items, please see this article.
Availability is handled by the software, but in the end, the original owner of the item can of course refuse the rental. We create a lead in the account of the original owner as if it is a quote when you use an item of theirs in a quote of your own. Those leads between your two accounts are then connected so that we can make management of them easier for you both.
When the customer takes steps to confirm by signing/paying (or however the confirmed status is setup for that account) the quote in the account of the original owner of the item being rented will be upgraded to contract status automatically as long as you have the setting "Automatic Status Upgrade Vendor Leads" checked in General Preferences -> Vendor Settings.

That owner can then send the contract to the user that is renting their item to get them to take the necessary steps to finalize reservation of the item. You can do this automatically if you turn on the Vendor - Automatic Contract Email in the Email Center.

If the user renting the item cancels with the customer for any reason, no automatic process takes place. They must also cancel with the original owner appropriately.


