
- Vendor: Availability Response - This alert will let you know when a vendor has responded to the availability response email, giving you availability information as well as pricing if they have filled it in.
- Vendor: Item Shared - This alert will let you know when someone has shared one of their items with you so you can add it as a shared vendor item. Shared vendor items are items that are used by other vendors in our software and give you extra features such as instant availability, pricing, and workflow movement.
- Vendor: PO Signed - This alert lets you know when a vendor has signed a PO that you sent them, indicating they are intending to supply the item you are requesting for the event.
Overview
How-to video on our vendor tools
If you sub-rent items from friends, you can now keep track of them and send automatic availability and and price requests to the vendors.
If you create multiple vendor items with the same name but assigned to different companies, the system will send out pricing & availability requests to all of these vendors when the item with (Multi Vendor) is selected.
After a vendor responds you’ll be able to see the availability and cost on that lead. Additionally, vendor items do not count against your rental inventory limit.
You can adjust the details manually as well (when viewing the event tab of a lead).
Managing your Vendors
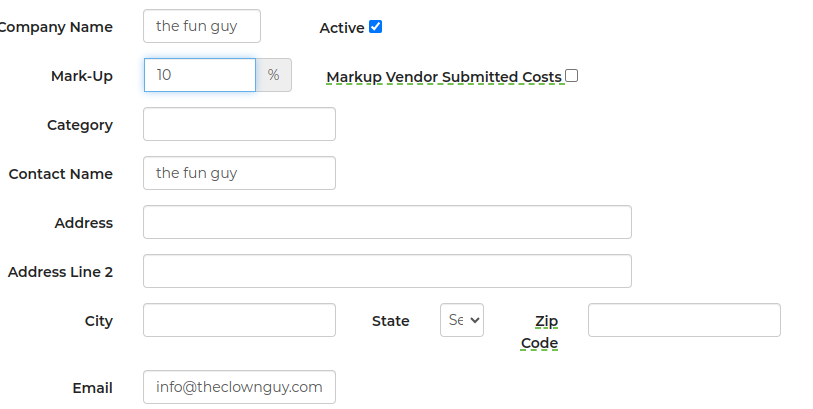
Go to Settings -> Vendors. Here you can add new vendors. The company name will show up next to the item if it is used in a lead. The email address will be used for notifications to the vendor.
Deleting a vendor will cause that vendor to be made inactive and also the items associated with that vendor will be marked "inactive". Inactive vendors and items can be viewed by selecting the "Inactive" preset filter. The vendor category will only show if you have vendor items. If selected location only has one category to choose from, it’ll automatically load its content instead of requiring it to first be clicked. You will be notified via email if a vendor item is no longer being shared.
Assigning an Item to a Vendor
When editing an item under Settings -> Inventory, go to the Advanced section to set the Vendor.
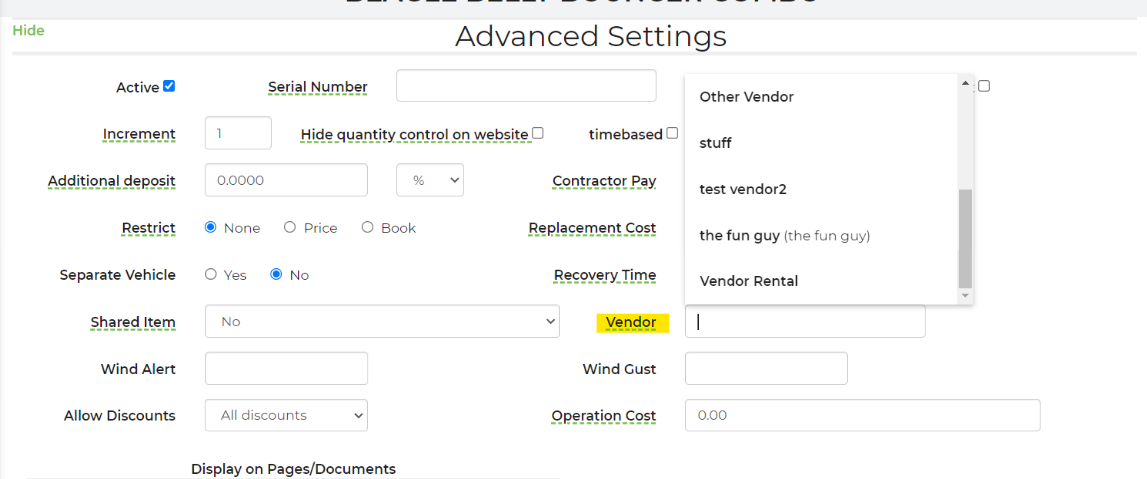
Keep in mind that if you don't set a category, it will not be counted against your inventory limit.
If you are changing an item to a vendor item, remember that you will not be able to see it in your inventory list unless you are filtering to show vendor items.
Adding a Vendor Item to a Lead
You can use the search box when editing a lead to find a vendor item or add a new one. Next you'll be able to create or assign an existing vendor to that item. When an item is created, this it will not have a category assigned to it and will therefore not appear on your quote page until a category is assigned to it under Settings.

If you need to add multiple vendor items, click update then repeat the process. Also note that you can still add single use items to the lead in the same manner as before (type in the item name and price and hit update).
To view the vendor's contact information from the lead, expand the vendor item by clicking on it and select the icon below: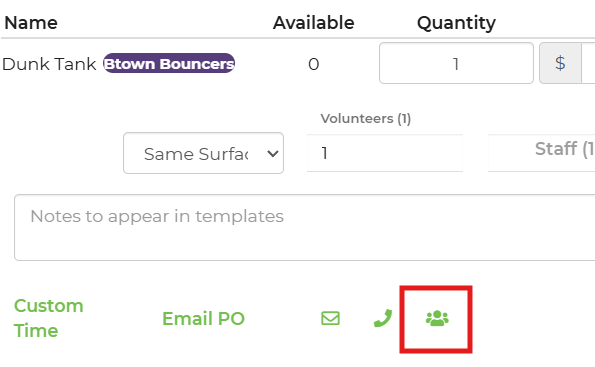
Also, if you remove a vendor item from a lead then later add it back, the cost and availability details will be lost.
Vendor Alerts and Notifications
After you add a vendor item to a lead the system will send an email to the vendor asking for them to provide the availability and cost to provide the item. The email is sent around 30 minutes after the last time the lead was modified. If there are multiple quotes from the same customer it will only send one email using the information from the most recently modified lead.
When a vendor gets the email they can click a link to say whether the item is available or not and the cost. They are only provided the event time and the city it's in.
There are 3 alerts you can turn on to manage your use of the vendor features:
Vendor Purchase Orders (POs)
You can send a PO to the vendor to confirm the reservation. POs are created under Settings -> Document Center -> PO Templates. In order for your Purchase order to be sent out, it must be classified as a Purchase Order.

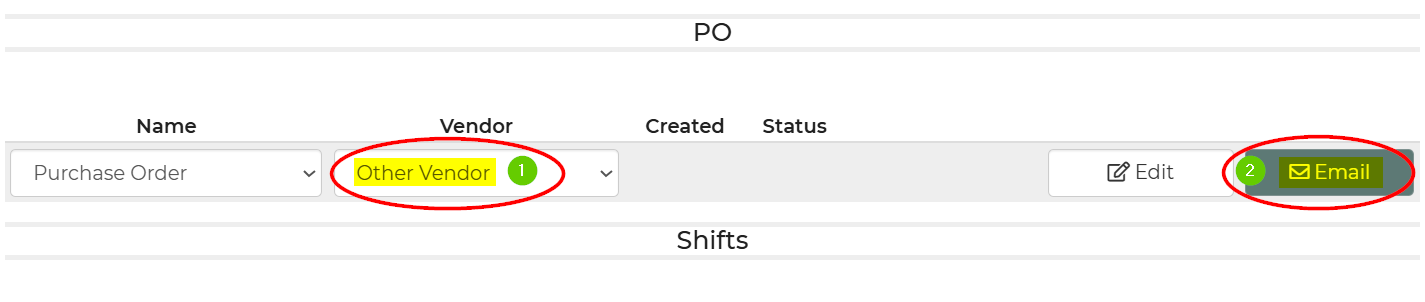
You can then send this to the designated vendor for the items needed by going to the lead that you are requesting vendor items from and navigating to the PO section.
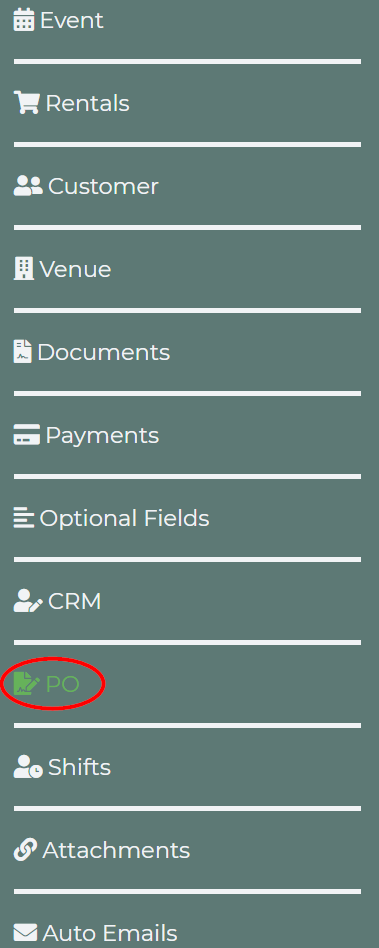
Once this has been located, you can send out an email to the vendor for the items being requested by selecting the template name, vendor, and then clicking the email button.
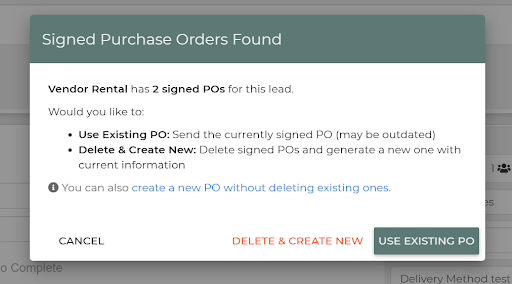
When sending a PO you are able to choose whether to Use Existing PO or Delete & Create New.
Other Notes
Vendor items do not count against your inventory limit unless you assign them to a category. Normal conflict checking does not work on these items which means the customer will always be able to auto-book these items. If the vendor you are using becomes or is a customer of, you can share items such that availability is known by the software and auto booking then will work more accurately.
We hope to add the following in the near future:
- ability for vendor to provide comments
- details about who is responsible for delivering the vendor items
Marking up Prices
You can increase the prices of vendor items by setting the % markup box to whatever you want and it will charge the customer x% more than the vendor is charging you.