
Creating a service area map with Google Maps is an invaluable tool for businesses looking to visually define the regions they serve. In this article, you will learn:
- How to create a map with Google My Maps
- How to add a mile range circle to the map
- How to embed the map in Elementor
How to Create a Map with Google My Maps
- Go to Google My Maps and log in to your Google account.
- Click on "Create a new map".
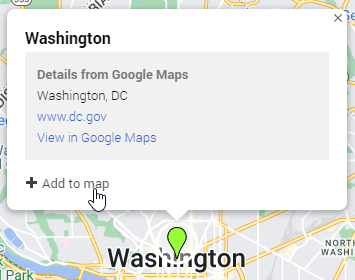
- Type in your city in the search bar.

- Select the pin on the map and click on "Add to map".
- You can add as many cities as you want by following steps 4 and 5.
How to add a Mile Range Circle to the Map
Because Google does not currently have a feature to add a circle around an area, we will need to use an external tool to generate the circle.
- Go to KML Circle Generator.
- Select your delivery range with the drop-down menu. Make sure to also select the unit of measurement.
- Pick where the center of your circle will be.
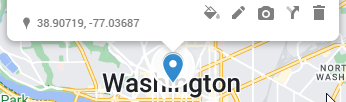
- Copy the Latitude and Longitude and paste it into the corresponding fields. You can find it by clicking on the pin in the map and it will be on the bottom left of the tooltip. The first number will be the latitude followed by the longitude.
- Click on "Generate circle" and it will download a KML file.
- Back on Google My Maps, click on "Add layer".
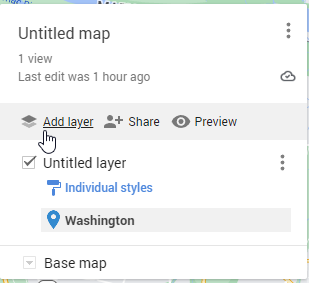
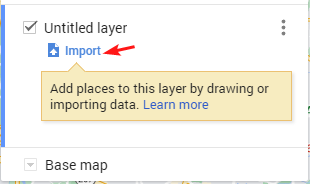
- Click the import button and upload the file.
How to Embed the Map in Elementor
- Click on the "Share" button next to the "Add layer" button.
- Name your map.
- Make sure the "Anyone with this link can view" option is selected.
- Open the map menu and select "Embed on my site".
- Copy the highlighted code.
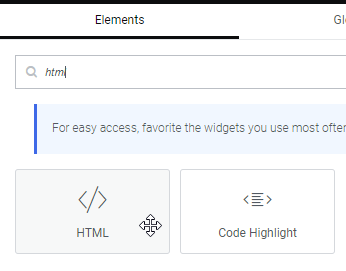
- In Elementor, drag and drop the HTML widget onto the page.
- Paste the copied code inside