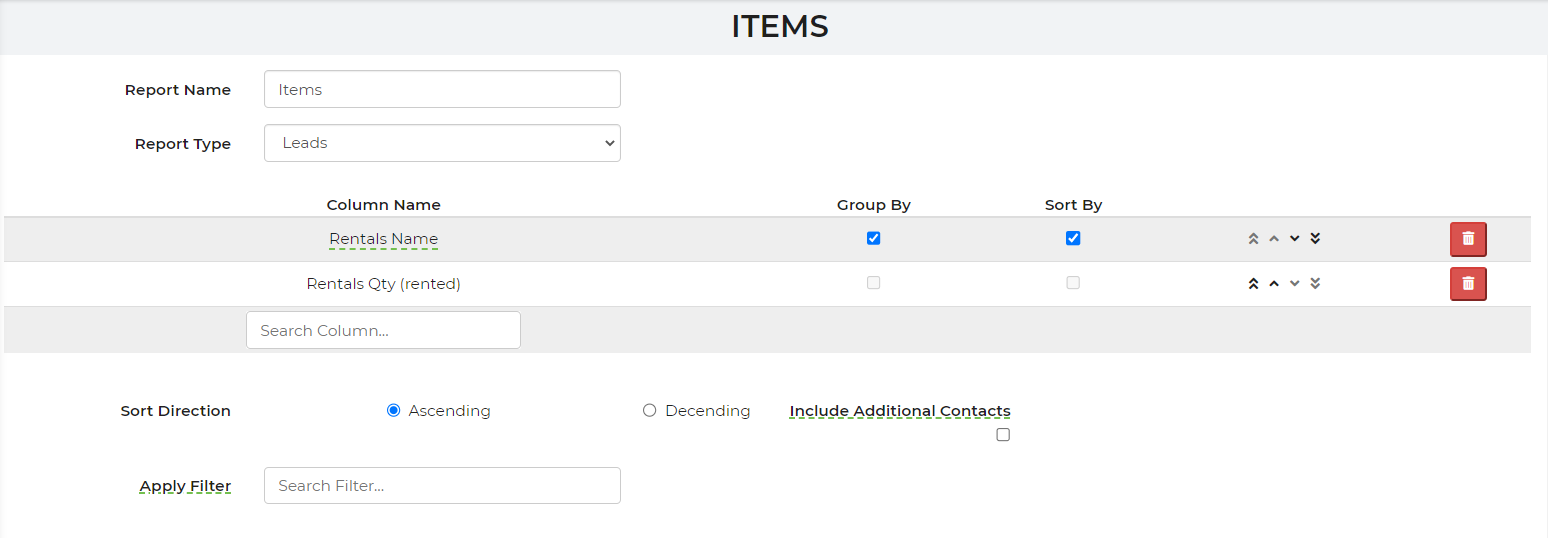
To take a look at a report that shows items rented during a period, you must first create a report. In order to make a report, please take a look at this article. In this case, we are going to create a report based off of items being rented. This is what our report looks like:

When it comes to the column, we added rentals name and rentals qty (rented). The rentals name is grouped by name so it totals up to the number rented, and sorted by name to make it easier to find.
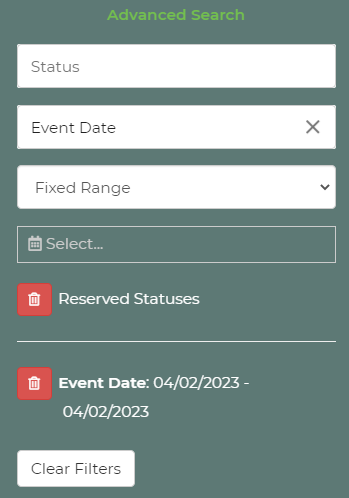
Once your report has been created, you want to verify it works by going to your Leads/Events. Once on this page, you will want to pick your date range using the filters on the lefthand side. You will want to select the fixed range of the date you are looking for the report and also anything in a higher status; anything higher than quotes. You want the report to show in hold, contracted or confirmed status. We filtered this like so:

(Keep in mind that these do not have to be in complete status, as the event has not happened yet.)
Be sure you enter in your report!
This will allow you to see what items and the quantity of the items that have gone out.
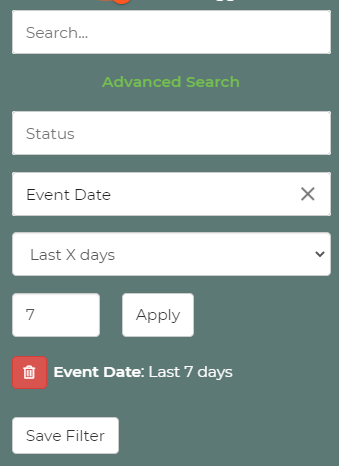
If you are looking at other date options, clear your filters and use the option for Last X Days and enter in the last 7 days, as shown in the example provided below. Any data available will display in the report.

Apply Filter to Report
You, too, have the ability to apply a filter to this report as well.
This filter created is for any higher statuses from quote.

To apply this to your report, you must go back into your created report (we have this as our Items report), apply the filter and then save. One you have applied this filter to the report, when you go back into your Leads/Events, the filter will automatically apply to the report.


