


Payroll Summary
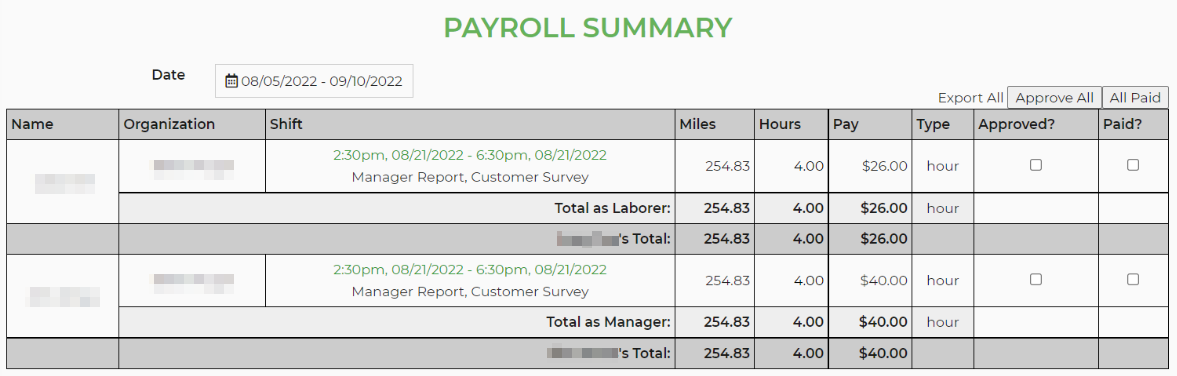
The payroll summary is accessed at Workers Payroll Summary. The payroll summary by default loads a 2 week window starting at the current date. Set the payroll period using the date range. The summary contains a summary of shifts per worker. Those shifts are further grouped by position. The total hours and pay are summarized by position and then totaled for that worker for easy reporting to your payroll company.
Sample of a payroll summary
The "Approve All" checkbox tells the software that it's ok to sent the shift information to QuickBooks, if you have that integrated. The "All Paid" checkbox will trigger an email to the worker if you are using the QuickBooks contractor pay integration. If you are not using the QuickBooks payment integration, you can still use these columns to note that a shift's duration has been verified and/or paid to the worker.
Pay Rates
You can have workers paid as hourly or contractor (paid fixed amount per job). For hourly, you have the ability to set different hourly rates per person and position that is performed. For contractor, you can set the amount they get per item that is part of an event that they are assigned to. In addition, you can set a mileage rate they will get when driving their own vehicle.
For Sales Reps, you can assign a commission they earn for the value of the event they are assigned to.
Contractor Shifts
1. Go to Settings -> Workers -> Positions and activate Contractor for the position (and make sure the worker is assigned that position).
2. Go to each Rental Item in Settings and put in the Contractor Pay.
3. On the Leads, use the Schedule tab to setup the worker who will be working the shift (or if you don't assign a person you can allow them to sign-up via the Workers Site).
4. When running Payroll (Logistics -> Payroll), it will calculate the amount owed based on the units rented for the events they managed as well as it calculates a mileage they had to drive for that event.
5. Set the Contractor Mileage Rate in the Settings -> Workers, select the worker, navigate to Preferences -> set mileage rate.
Hourly Shifts
1. Set the Hourly rates on the Position and/or the Worker (see below).
2. On the Leads, use the Schedule tab to setup the worker who will be working the shift (or if you don't assign a person you can allow them to sign-up via the Workers Site).
3. When running Payroll (Logistics -> Payroll), it will calculate the amount owed based on the units rented for the events they managed as well as it calculates a mileage they had to drive for that event.
Hourly rates: can be set per worker, per position, or per position per worker. The order in which they are applied is as follows. The software will first use the per position per worker rate (this is found when assigning a position to a worker). If it is zero or empty it will then use the position rate, and finally the worker rate.
Sales Reps
1. Go to Settings -> Workers -> Positions and activate Sales Rep for the position (and make sure the worker is assigned that position).
2. On the Leads, set the sales rep on the event tab to the worker who earned the sale.
3. Configure the Commission tab on the Worker.
4. When running Payroll (Logistics -> Payroll), it will calculate the amount owed based on the units rented for the events they managed as well as it calculates a mileage they had to drive for that event.
Exporting Time Sheets for Payroll
Where to Find It
- Navigate to Logistics -> Payroll.
- Select your time frame for the pay period.
- Click Export All.
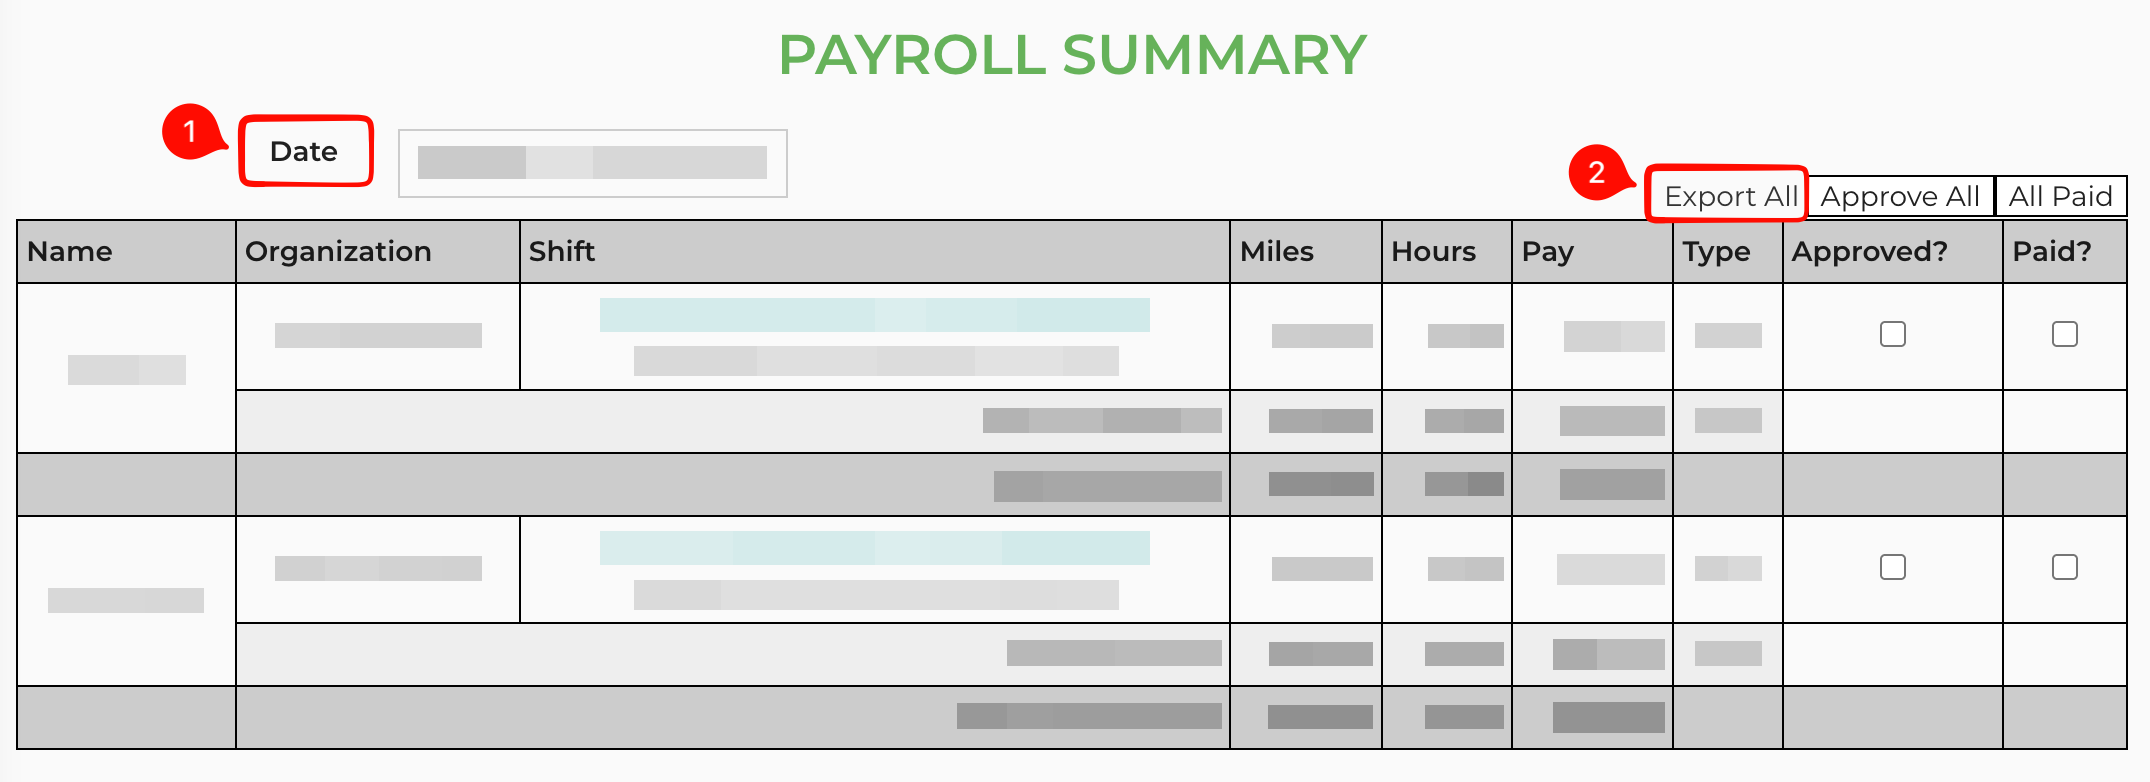
The Payroll Report CSV export includes detailed notes for every time-clock event. This allows you to see specific worker feedback or reasoning directly in your payroll spreadsheets without having to cross-reference individual timecards.
The payroll export includes additional columns:
- ID
- First Name
- Last Name
- Position
- Location
- Date
- Scheduled Hours
- Hours
- Rate
- Total Miles
- Paid Miles
- Mileage Rate
- Mileage Pay
- Pay
- Type
- Approved
- Paid
- Clock In Note: Displays the reason or note provided when a worker clocks in.
- Break In Note: Displays notes from the start of a break.
- Break Out Note: Displays notes from the end of a break.
- Clock Out Note: Displays the reason or note provided when a worker clocks out.
How it Works
- Multiple Breaks: If a worker takes multiple breaks during a single shift, the notes are aggregated chronologically and separated by a semicolon ( ; ).
- Shift Types: These notes are automatically projected for scheduled shifts, grouped shifts, and unassigned time-clock rows.
- Sales Commissions: For sales representative commission exports, these fields will remain blank as they are not tied to specific time-clock events.
- Data Integrity: The export uses improved CSV formatting to ensure that notes containing commas, quotes, or newlines are correctly escaped and don't break your spreadsheet layout.