Effective Jan 10, 2023, we now have an Accidental Damage Waiver fee incorporated and applied to all newly created accounts. You can go in and disable this at anytime, or you can customize the amounts to fit your business needs! Adding an Accidental Damage Waiver is an effective way to cover the high costs associated with replacing a unit or keeping up with regular maintenance. By offering this waiver, you provide reassurance to your customers that they will not be held responsible for any damage beyond their control, knowing they are covered by the Accidental Damage Waiver. This added protection can significantly enhance customer satisfaction and loyalty, as it alleviates the worry of unexpected expenses.
Moreover, the minimal fee associated with the waiver is a small price to pay for the peace of mind it brings to both you and your customers. It simplifies the process of dealing with damages, ensuring that repairs or replacements are handled smoothly without financial strain on either party. To apply the damage waiver, please follow the steps outlined below.
Step 1 - Adjust the Fee
By default, the software includes an Accidental Damage Waiver, which will create a Promotion & Fee, Optional Field and a Filter. You will need to customize it to suit your preferences. To adjust the fee, follow these steps:
- Settings
- Promotion & Fees
- Select on the premade Accidental Damage Waiver
- Set the fee to your desired amount
- Save & Close
Step 2 - Apply the Accidental Damage Waiver to the Quote Pages
To apply the fee to your selected pages, follow these steps:
- Settings
- Optional Fields
- Select on the Accidental Damage Waiver
- Quote Form -> select the pages in which you'd like the damage waiver to appear
- Save & Close
If chosen, the Accidental Damage Waiver for the "Quote Request - WordPress" can be found on the checkout page. This is in the highlighted section below.
In the Optional Fields, you can also preselect the Accidental Damage Waiver to be checked or unchecked by default.
- Checked - This will automatically apply the Accidental Damage Waiver to . If the customer does not want the Accidental Damage Wavier, they will have to uncheck it.
- Unchecked - This will not be checked for the customer, and the customer would have to check this for the Accidental Damage Waiver to apply
Step 3 - Accidental Damage Waiver Filter
If there are specific inventory items you wish to exclude from the Accidental Damage Waiver, you'll need to adjust your filter settings accordingly. This will ensure that only the desired items are covered by the waiver, while those you want to exclude are omitted from the coverage. Adjusting the filter properly will help you tailor the waiver to your specific needs and preferences. If you don't intend to exclude any items, you can remove the second filter. For more information on filters, please see this article.
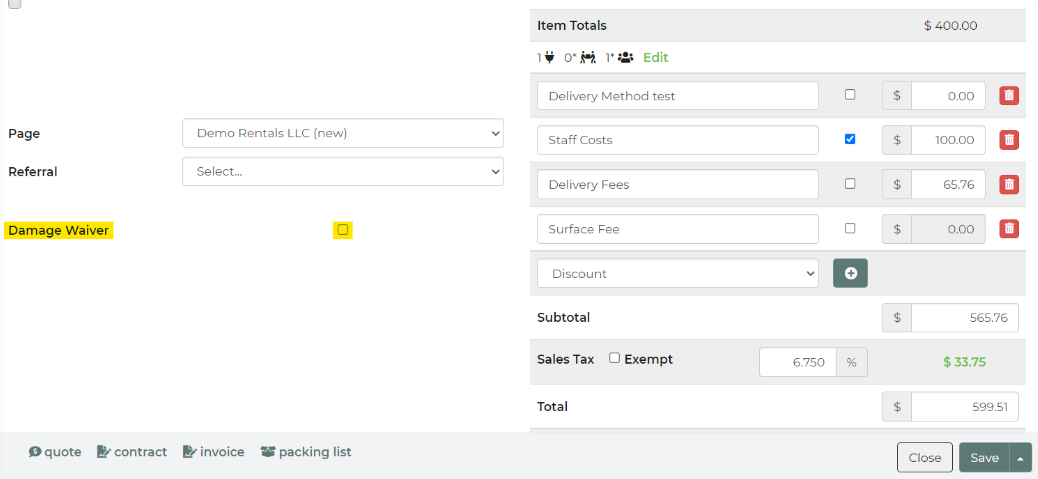
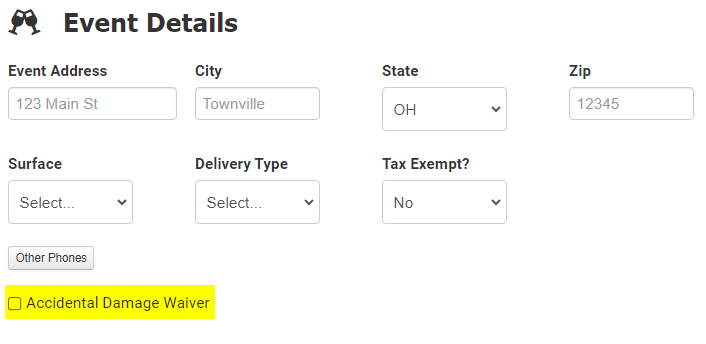
Step 4 - Verifying the Accidental Damage Waiver Applies
If you create a Lead/Event, you should be able to locate the Accidental Damage Waiver in the section you have chosen for "Display on section" in your Optional Fields. Tick the Accidental Damage Waiver box off to apply the Accidental Damage Wavier to the total as show below.