
Conditional pricing is pricing for items that only is applicable during certain conditions. To define the conditions you need to build filters. These are the rules that must be followed for the pricing to apply. Pricing is built normally and applied when a filter matches. Conditional pricing works for any prices being shown on your website as well as any lead being created on the backend.
Autosave Leads
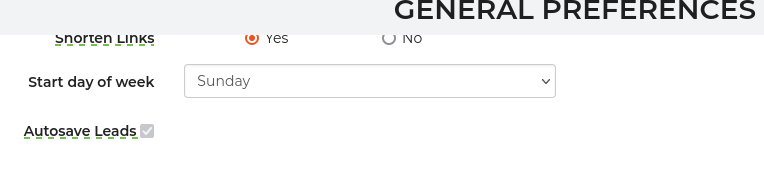
If you are a newer user, you will already have autosave leads turned on for you by default to enable these amazing features. Because we are behind the scenes saving hidden leads before they are leads so that we can use the filters to check for matches before applying a price, it’s necessary for any account using conditional pricing or conditional promotions to have autosave leads turned on. It can be found in Settings -> General Preferences.
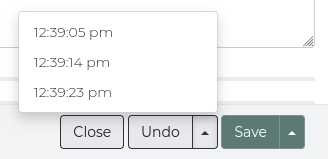
With autosave for leads turned on, if we detect a delay in your work on a lead, we will initiate a save. You will probably not even notice autosave unless you look at the save button below. You will see of course the warning on the save button saying that you have changes that are unsaved like normal. This will disappear on its own because we are saving for you. Additionally you will see an undo button. That undo button will undo our last autosave. You can also use the arrow to undo back to a specific autosave.
In the log of the lead, you will also see the autosaves and be able to click the entries to open them up and see what was saved. By reviewing this, you can determine how far back you want to undo the autosave. Or you can simply see the former information that you want and copy it into the appropriate fields.

Another thing you may notice is that your prices will change as you enter data because you will trigger some of the conditional pricing you set up. Otherwise, working with leads behaves the same way.
With WordPress Websites
Conditional pricing works with WordPress websites as well. If you are using our WordPress plugin with one of our sites, we will gather information about your site visitor as they interact. Currently that information is limited to their event date/time and delivery address. In the future we plan to make it possible for you to add other inputs to gather other information you find important to your pricing. As they fill in that information, pricing on the site and in the cart will update automatically.
Making Conditional Prices
To set up conditional pricing on an inventory item, go to the pricing section of the item and click the link in the upper right to “Show Conditional Pricing.” Once you do, your entire price you previously had on that item will show as the first row of a table of prices and filters. It is considered your base price which is the price that will show unless a filter is triggered.

You have 2 behavior options you can choose from when setting up your conditional pricing:
- Override & Stop: When this is chosen, any lead that matches the filter you set for it will use this price. We evaluate these in order from top to bottom, so put your higher priority conditions higher because once we find a match we will use it and not look at any conditions below this entry. You can click and drag these into different orders. These types may be the easiest to understand because you are choosing one price over another based on your filter conditions.
- Add to Price: These will add to any base or other condition that matched. All of these that match will add to the base or override price. There will always be a base or override price chosen and these will stack on top. You cannot change the order of these because the order is irrelevant. They will be displayed at the bottom of the conditional pricing table. These can be powerful but take more thought because you are adding potentially many to a price. They are best for things like adding $50 if the setup surface is concrete or adding $30/hour if they choose a delivery type that requires staffing.
After choosing the behavior, you need to choose or make a filter. The only filters available to be used here are filters of the pricing type. This is to ensure that the additional filters built for pricing are not a nuisance in other areas of the software. If you want to test your filters, I suggest making them first Lead filters and testing them to see if they match the correct leads on the leads page. Then switch them to pricing type filters. Lastly you can select a price that you have already setup or make a new price right there. You can also view and in some cases edit your price by clicking the edit price button.
Reverting Back to Single Pricing
You can revert back to non-conditional pricing for any item by first deleting all the pricing conditions in the table for that item. When you do this, a link will display called “Show Single Pricing.” You do not need to click this, but you can if you want to see that view while editing your inventory item.
Turning Autosave Off
To turn autosave off, you must first disable all conditional pricing and promotions in your account. Then it will allow you to switch it off in General Preferences.
Below is a video with some more information on conditional pricing.