


The Delivery Planner is a timeline tool for assigning, sequencing, and routing pickups, deliveries, and staffed events. It includes auto‑loading into vehicles, Google Map routes, and fast drag‑and‑drop controls. This document is a general overview of the new Delivery Planner and its features, and is a work in progress.
Prerequisites
- Access to Events and the Delivery Planner.
- Leads with event times and delivery methods (Pickup, Staffed, or Delivery).
- Optional: Multi‑Location accounts should confirm each lead’s Location so filtering works.
- Recommended: Set your Default Start Time (Planner loads 24h starting at this time).
Getting Started
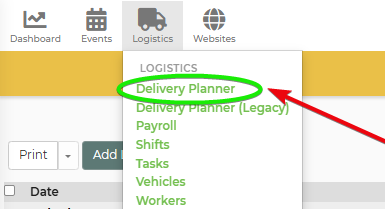
1) Navigate to Logistics Tab Menu at the Top, Then Open the Delivery Planner
- Open the Planner and confirm the date range at the top of the left sidebar.
- Multi‑Location: Use the Location dropdown to filter events.
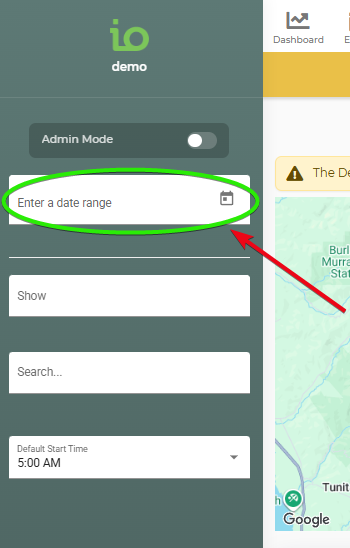
2) Set a Date Range
Date Range can only be set up to a 7-day range.
-When viewing multiple dates simultaneously, the timeline can become compressed & difficult to read. You can adjust your view using the following controls:
- Pan: Use the arrow keys or hold Shift + Drag with your mouse.
- Zoom: Click the +/- buttons or use Shift + Mouse Wheel
- Reset Zoom: Navigate to View > Reset Zoom to return to the originally loaded start & end date.
- Fit All Blocks: Navigate to View > Fit All Blocks to automatically resize the timeline so all loaded blocks are visible.
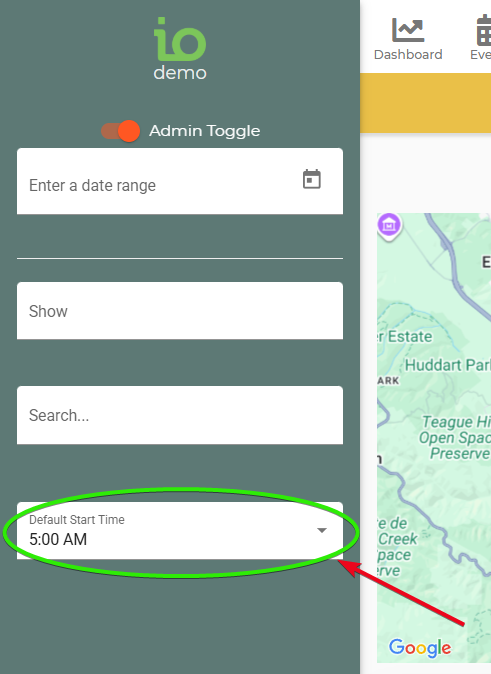
3) Set the Default Start Time
- At the bottom of the left sidebar, set the planner’s Default Start Time.
- The planner loads a 24‑hour view starting at this time.
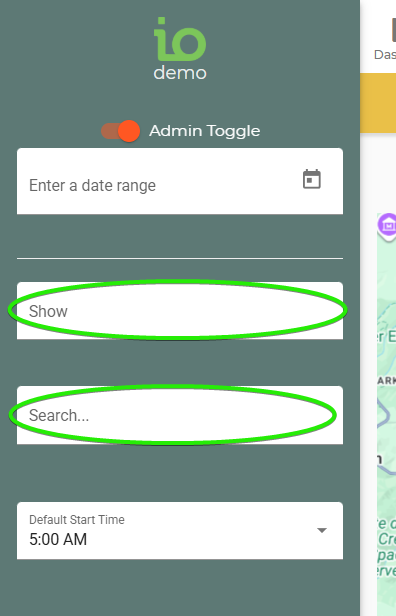
4) Filter visible blocks (optional)
- Use Show and Search filters to narrow what you see.
- Non‑matching blocks fade and cannot be dragged while filters are active.
5) Understand rows and block types
- Unassigned rows (top): Pickup, Staffed, Delivery.
- Vehicle rows: One row per vehicle appears below Unassigned rows.
- Block colors:
- Setup: CYAN
- Event:BLUE (not shown if Staff Operated = No)
- Tear Down: PURPLE
- Address (custom stops): PINK
- Shift: BROWN
- Travel (auto‑calculated): GREEN
- Small Limit indicators (event time constraints): RED
- Delivery Window: YELLOW (slim)
- Return Window: ORANGE (slim)
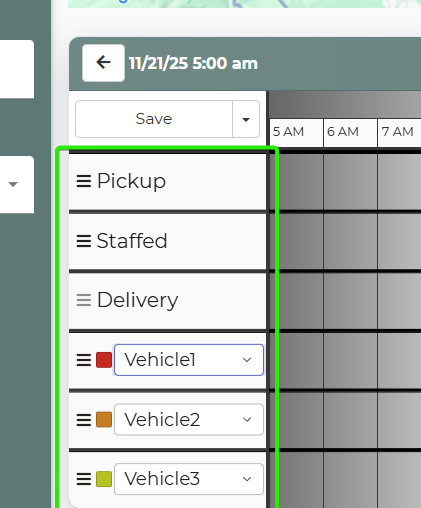
6) Load events into vehicles
- Drag blocks from an Unassigned row to a Vehicle row.
- Pickup events (Setup + Tear Down) stay in the Pickup row; you can still assign Shifts.
- Staffed events (Setup + Event + Tear Down) and Delivery events (Setup + Tear Down) can be moved into Vehicle rows for routing.
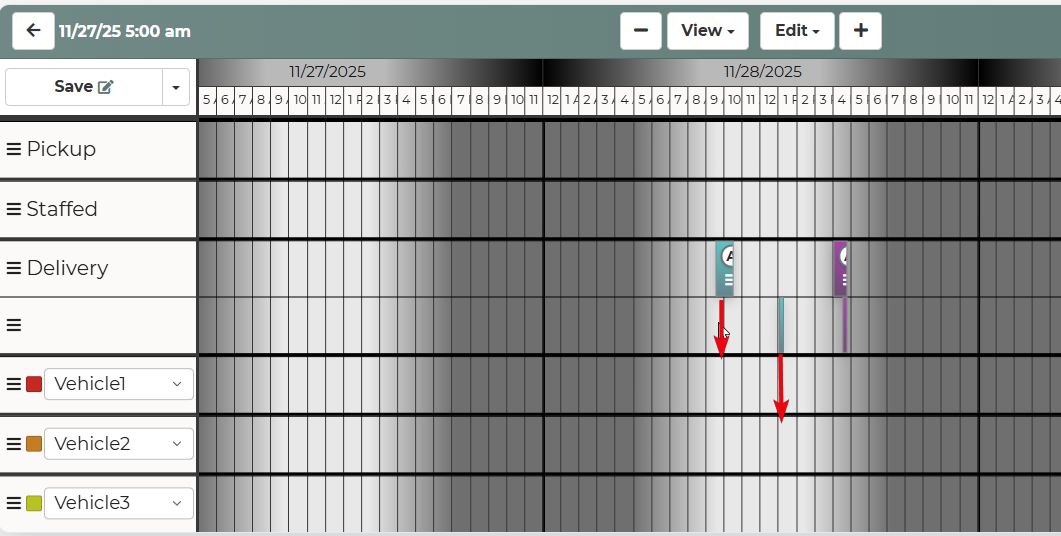
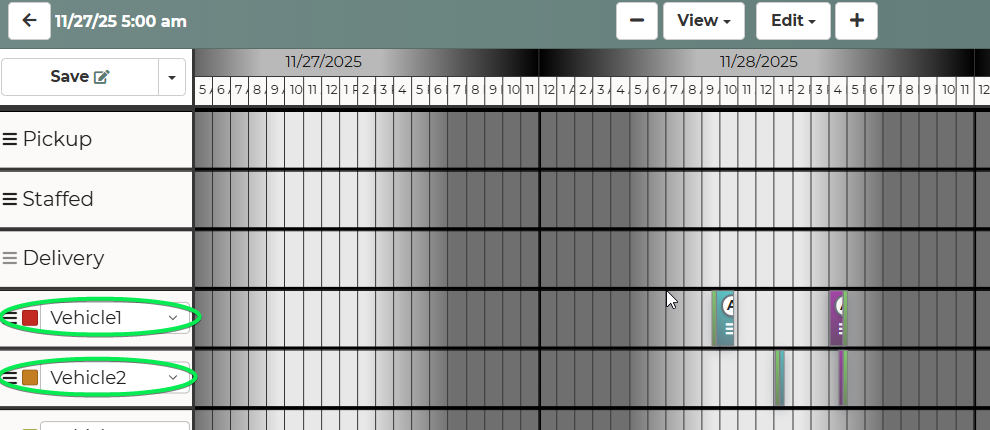
7) Use Auto‑load and Save
- Save: Commits changes within the current date range.
- Auto‑load (global): Assigns all visible blocks to vehicles using route optimization.
- Vehicle Auto‑load: From a Vehicle row menu, auto‑load just that vehicle’s blocks.
8) View routes on the map
- The map shows vehicle routes with directional lines and lettered A/B/C markers matching timeline blocks.
- WH marker represents your warehouse. Routes begin and end at WH.
- Hover a vehicle’s color swatch to isolate its route; click to persist isolation.
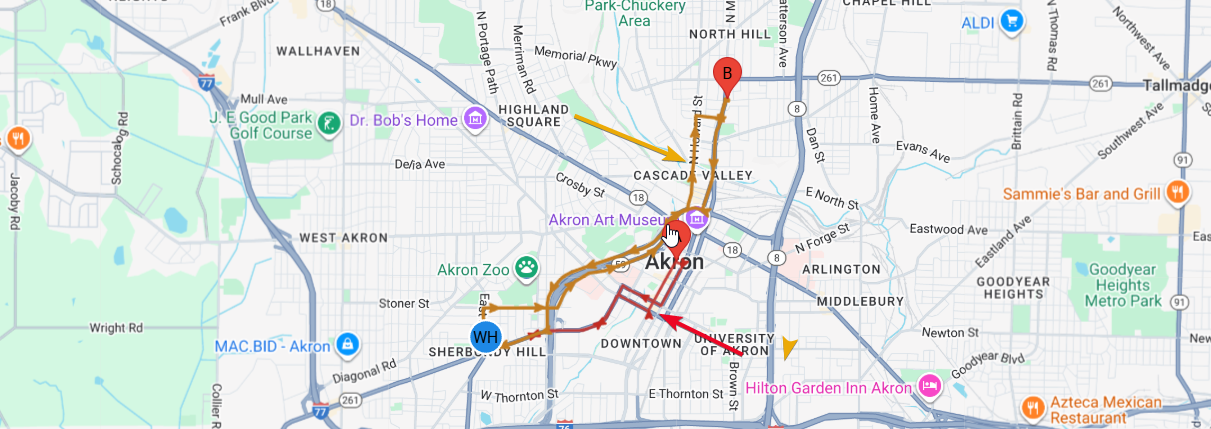
9) Print, Undo/Redo, Clear
- Print: Open documents (Directions, Packing Lists, Unsigned Contracts) for all visible blocks, or per Vehicle row.
- Undo / Redo / Undo All: Revert timeline actions since loading. Undo All does not undo previously saved changes.
- Clear All: Return blocks to original Unassigned positions/times and remove Shifts/Address blocks (confirm, then Save to apply).

10) Adjust timeline view
- Pan with arrow buttons or Shift + drag.
- Zoom with +/- buttons or Shift + mouse wheel.
- View -> Reset Zoom returns to loaded start/end.
- View -> Fit All Blocks resizes to show all loaded blocks.

Feature Options & Parameters
Delivery Methods and blocks
- Pickup: Setup + Tear Down; stays in Pickup row; can add Shifts.
- Staffed: Setup + Event + Tear Down; can move to Vehicle rows; can add Shifts in Staffed row or after assignment.
- Delivery: Setup + Tear Down; move to Vehicle rows; add Shifts only after assignment.
Block menus (per block)
- View Lead (new tab), View Details (edit times and notes), Add Shift, Resize, Unlink (move independently), Lock/Unlock, Move/Duplicate to Vehicle rows.
Row menus
- Unassigned rows: Lock/Unlock all blocks, Add Shift (not for Delivery row).
- Vehicle rows: Lock/Unlock all, Add Shift, Auto‑load (per row), Print (per row), Add Address Block.
Address blocks
- Add custom stops with address autocomplete, duration, and notes (not tied to a lead).
- Drag/resize like normal blocks.
Travel blocks (green)
- Auto‑calculated between stops; adjust automatically when sequences change.
- Assume WH when no adjacent stop or a gap > 6 hours exists.
Vehicle colors
- Set a Vehicle Color in Settings; otherwise, a consistent auto‑color is used.
Constraints (Small Limit indicators, red)
- Setup cannot move past event start (right).
- Tear Down cannot move before event end (left).
- Event blocks move vertically only (row changes), not horizontally.
Troubleshooting & FAQs
Q: I can’t drag a block horizontally.
A: Event blocks only move vertically. Setup cannot move past event start; Tear Down cannot move before event end.
Q: My Event (blue) block is missing.
A: If the delivery method’s Staff Operated is set to No, Event blocks are hidden on the planner.
Q: The route/map isn’t updating.
A: Ensure the blocks are assigned to a Vehicle row. Try isolating the vehicle via its color swatch. Reload if needed.
Q: Auto‑load moved everything to different vehicles.
A: Use per‑Vehicle Auto‑load to optimize one row at a time. Use Undo if the result isn’t desired.
Q: What is "Clear All"?
A: Clear All returns blocks to original Unassigned positions and removes Shifts/Address blocks. Save to apply.
Q: What is "Undo All"?
A: Undo All reverts timeline actions since loading but does not revert previously saved changes.
Q: Delivery/Return window bars don’t drag
A: Yellow (Delivery) and Orange (Return) windows are tied to the lead; they move when you move the associated blocks.
Q: Map shows overlapping routes
A: Hover or click a vehicle’s color swatch to isolate its route temporarily/persistently.
Q: Current Delivery planner vs Legacy planner
A: Do NOT schedule the same date ranges/jobs in both. Use the current version for test/future leads first.
Q: Why are my events difficult to read when multiple dates are selected?
A: When viewing multiple dates, the timeline compresses to fit the expanded date range on your screen. This can make individual events harder to read, however the timeline view can be changed to read the details more easily.
Related Links
- Vehicle Packing Lists
https://rental.software/support/knowledge-base/article/vehicle-packing-lists
- Adding a New Lead or Event
https://rental.software/support/knowledge-base/article/adding-a-new-lead-or-event
- Updating and Editing a Lead
https://rental.software/support/knowledge-base/article/updating-and-editing-a-lead
- Custom Times on a Lead
https://rental.software/support/knowledge-base/article/custom-times-on-a-lead
- Calendar: Conflicts and Indicators
https://rental.software/support/knowledge-base/article/calendar-conflicts-on-io-calendar