
Linking/Unlinking Shared Items
Unlinking shared items allows you to unlink shared vendor items on the receiving side. It also revises the dropdown button for vendor items. Unlinking a shared item disconnects it from the vendor sharing the item so that you can transfer it between accounts without re-entering all details.
Step-by-Step Instructions:
1. Open Settings -> Inventory -> Search Bar -> Available Vendor Items
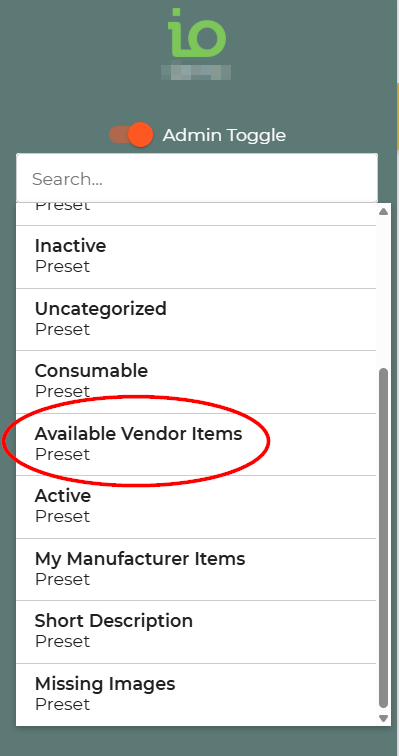
2. Select the checkbox next to the item(s)
a. Select the dropdown (Next to "Delete" Button)
b. Choose Add Linked Vendor Item OR Copy Item To My Account
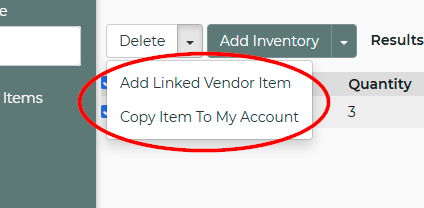
3. Using the actions in the dropdown box:
a. When adding vendor items locate the button labeled “Add Linked Vendor Item.” (This will add the item to your inventory as a Vendor Item.)
b. You will also see an option called “Copy Item To My Account.” (This will duplicate the shared item as is to your inventory without being linked to the original vendor.)
c. Choose the appropriate button based on whether you want to keep the link or completely copy the item into your account.
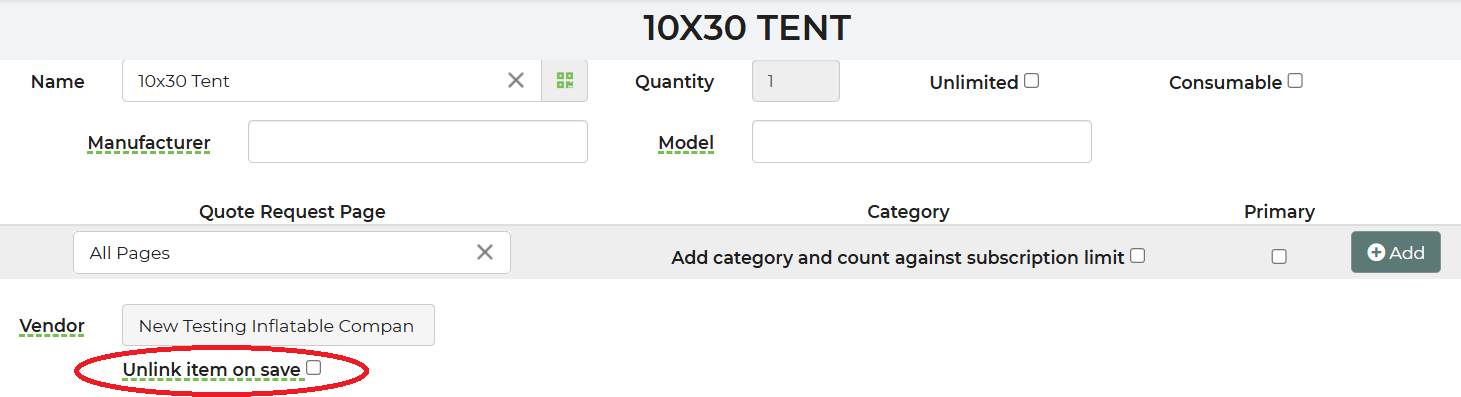
*If you add any items as vendor items, you are able to unlink those items in the item settings under the "Category" section.
Shared items with nested accessories are able to be copied with the accessory by selecting "Yes" when prompted.

When you share an item that includes an accessory, the accessory won’t tag along unless the Vendor shares it too. To make sure your accessory is successfully copied along with the item, the Vendor must share it as well.
Related Articles:
Sharing Inventory Through Vendors: https://rental.software/support/knowledge-base/article/sharing-inventory-through-vendors
For further assistance or questions regarding this functionality, please contact support.