


You can send printed postcards to your customers directly through InflatableOffice using the Send Postcard automation action.
Follow the steps below to choose your artwork, select your recipients, and set up your automation.
1. Create your postcard
Go to Settings → Document Center → Postcards and create a new postcard.
- Give your postcard a name.
- Upload your front artwork.
- If your design includes a separate file for the back, enable Add Back Image and upload that file.
- Make sure the postcard is active, then save it.
You can upload PDF, JPG/JPEG, PNG, or BMP files, up to 10 MB per file. Uploaded images are converted automatically when sending. You can also use a publicly accessible PDF URL.
Using a two-page PDF? For U.S. postcards, upload the combined PDF as your Front Artwork File and leave Add Back Image unchecked. ClickSend uses page 1 as the front and page 2 as the back.
Before uploading, review ClickSend’s postcard format, size requirements, and downloadable templates:
- United States and other countries outside Australia: 2480 × 1748 pixels at 300 dpi, with 5 mm bleed.
- Australia: 2480 × 1535 pixels at 300 dpi, with 2 mm bleed.
Use the template for your destination country and leave the designated address area clear. ClickSend prints the recipient’s address in that space. For Australian postcards, follow the page order shown in ClickSend’s Australian template.
Using a postcard add-on? Follow the creator’s instructions to submit your business details. Your personalized artwork must be marked ready before it can be sent.
2. Create your recipient filter
Go to Settings → Filters and create a filter for the customers or events that should receive your postcard.
For example:
- Name the filter.
- Select the conditions that will warrant a postcard being sent, such as a certain Lead Status or City.
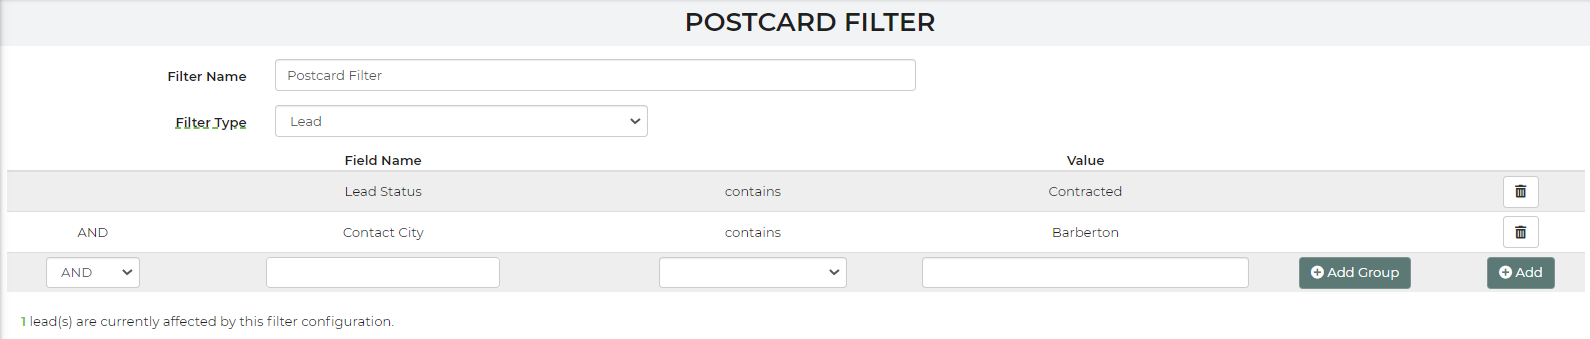
3. Save the filter.
Go to your Leads/Events or Customers page and apply the filter to check that it selects the correct records.
3. Create your automation
Go to Settings → Automations and create an automation.
- Give the automation a name.
- Select the appropriate location if you have a multi-location account.
- Choose your recipient filter and configure when the automation should run.
- Add the Send Postcard action.
- Choose your postcard design.
- Select an available mailing report for the address you want to use, such as the customer or venue address.
- Review the action’s run limit.
- Save and activate the automation when you are ready to test.
The filter determines which records qualify. The mailing report supplies the recipient’s name and address.
A postcard will not be sent without a complete name, street address, city, state, ZIP/postal code, and country.
4. Check your test send
After the automation runs, open its Action Log to check the result.
A successful result means the mailing provider accepted the postcard for processing. It does not confirm postal delivery.
If the request fails, review the error message and correct the artwork or address information. A failed attempt may count toward the action’s run limit, so contact support if you need help retrying it.
Once you have received and reviewed your test postcard, update the filter to include your intended recipients.
Important information
- Postcard mailing charges are separate from any postcard add-on subscription fee.
- Review your monthly postcard spending limit before activating a larger mailing.
- The same postcard is blocked from being sent repeatedly to the same address.