
Do this to save yourself time, so that you don’t have to enter your invoices/payments in two places; enter the data once into the software (IO) and everything will import into Quickbooks Desktop! 🎉
⭐To setup Quickbooks Online, go here.⭐
What version does it work with?
The software (IO) is compatible only with the Windows (XP, Vista, Windows 7) desktop version of QuickBooks for the USA or Canada. If you are in another country and wish to use it, you’ll need to contact us at: (440) 385-4080 or by email at: Support@inflatableoffice.com. It is not currently compatible with Mac versions of QuickBooks Desktop. We also support the online version which will work on any computer, but again, only USA or Canada at this time.
Steps to connect IO and Quickbooks Desktop
- We recommend that you first make a backup of your Quickbooks company file. See QB instructions here.
- If you only have 1 Location in IO, then go to the software and login as the admin of your IO account.
- If you have multiple Locations in IO, then in the software, you will need to create a worker specifically for Quickbooks integration. You need only to give that worker permission to the Quickbooks settings in IO. You also need to specify what locations you want to sync to your Quickbooks account under that worker and set those locations to that worker account. Lastly, login as that worker.
- Go to Settings (gear icon) ⚙
- Click "Quickbooks".
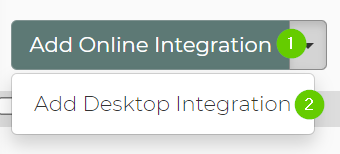
- Click the dropdown next to the Add Integration button. Select Add Desktop Integration.
- The default name is "Desktop Integration"; you can rename it, if desired.
- Click Save & Close button at the bottom of the screen.
- Then once it is created, click it (to open it).
- Enter your IO password.
- Click Enable Integration & Download App button. This will download the .QWC file that the QB Web Connector needs in order to connect to IO.
- Download and install the QB Web Connector. Get the download and instructions here: QB Web Connector download/setup instructions. You will need to login to Quickbooks to finish setting up the link, but make sure you are logged into the QB account that you want to be connected to IO.
- Enter your password you used when setting up the integration in our software in the area circled in this article.
- Once you finish making the link in QB, you should be connected!

Using the Web Connector When the File is on a Server or Network Computer
You can have your QuickBooks file on a server or network computer and still use the IO integration. For these situations, we recommend contacting Intuit to determine the best way to set this up. However, from our experience with customers that use this method, there are 2 options that seem to work well:
- Have a copy of QuickBooks on the network computer. Also install the Web Connector on the network computer. Make sure the Web Connector is setup to start automatically every time the network computer power is cycled. From this point, setting up the integration is the same as doing it on your own personal computer. You may however need an additional license of QuickBooks if you want to access your file from your personal computer over the network.
- Map the network drive on your personal computer to access the QuickBooks file from your personal computer. In this scenario, you will not install QuickBooks on the network computer - only the QuickBooks server database tool. Setup the integration the same as usual now on your personal computer. The only difference is that you need to make sure the path to your QuickBooks file is pointing to the file on your network drive. If you need to change your file path, you can do so by going to Settings -> QuickBooks -> Enable QuickBooks Integration, click the show/hide link, and then update the path field under step #4 and click "Save Location."