With the integration of UTM tracking in the Email Center and on Elementor forms within your website, you can easily track leads and evaluate the performance of your marketing campaigns.
By setting up UTM fields within Elementor forms, you can capture valuable data that can be imported into the software, allowing you to analyze and optimize your marketing strategies effectively. The email center automatically adds UTM parameters to all links sent in manual and automated emails. The data is imported to the respective lead and can be analyzed utilizing filters and reports built within the software.
| What is UTM? UTM stands for Urchin Tracking Module. It's basically a simple code you add to the end of a URL to track where your website traffic is coming from. This helps you see which ads, links, or campaigns are driving people to your site. It's like adding a tag to your URL so you can easily identify how visitors found your website. |
In this guide, we'll walk you through the process of using Elementor forms to set up UTM fields, building filters to evaluate your marketing efforts, and viewing UTM data on leads in the software.
Setting Up UTM Fields in Elementor Forms:
Step 1: Create a New Form
- Log in to your WordPress dashboard and navigate to Elementor.
- Create a new form or edit an existing one using Elementor's form builder.
Step 2: Add UTM Fields
- Within the form builder, drag and drop the appropriate form fields to capture UTM parameters:
- Source: where traffic is coming from - website, Google, Facebook etc.
- Medium: how they got there - organic, paid, email ID etc.
- Campaign: why the traffic is coming to you or the specific promotion/offer.
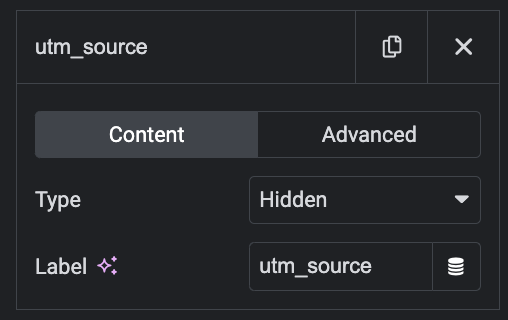
- Under "Content" select under Type = "Hidden" and Label = "utm_source"
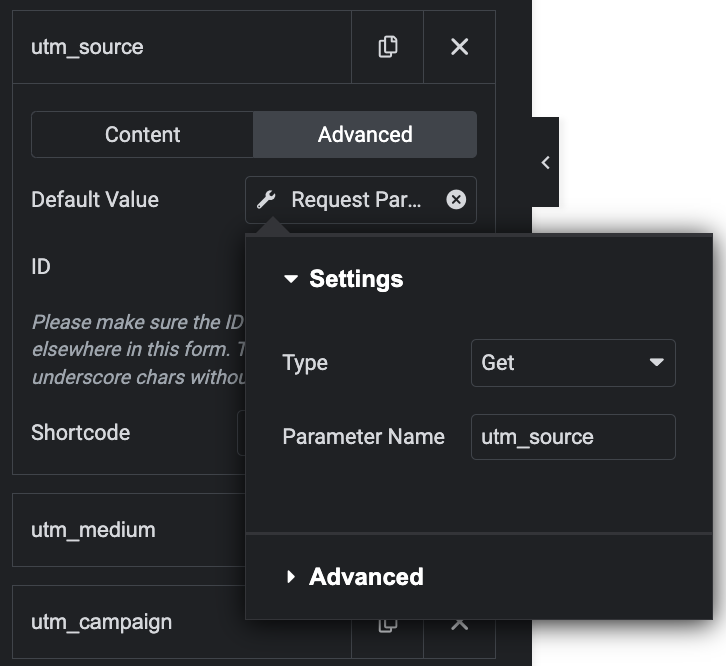
- Navigate to the "Advanced" tab, select "Request Parameter" with Type "Get" and under Parameter Name enter "utm_source".
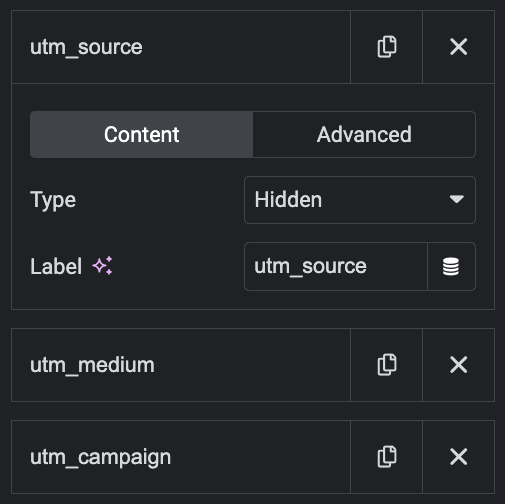
- Repeat the above steps for the Medium field and the Campaign field.
- Select "Update" to apply form changes.
Step 3: Include UTM Parameters in the Redirect URL
- Include UTM parameters in the URL to track the source of the form submission.
- For example, if your website URL is www.example.com and you want to track a Facebook ad campaign, your redirect URL could be www.example.com/thank-you/?utm_source=facebook&utm...
- Here is a simple tool for creating links with UTM parameters.
Building a Report and Filter to View UTM Data:
Step 1: Navigate to Reports
- Navigate to the "Reports" option under the gear icon.
Step 2: Create a New Report
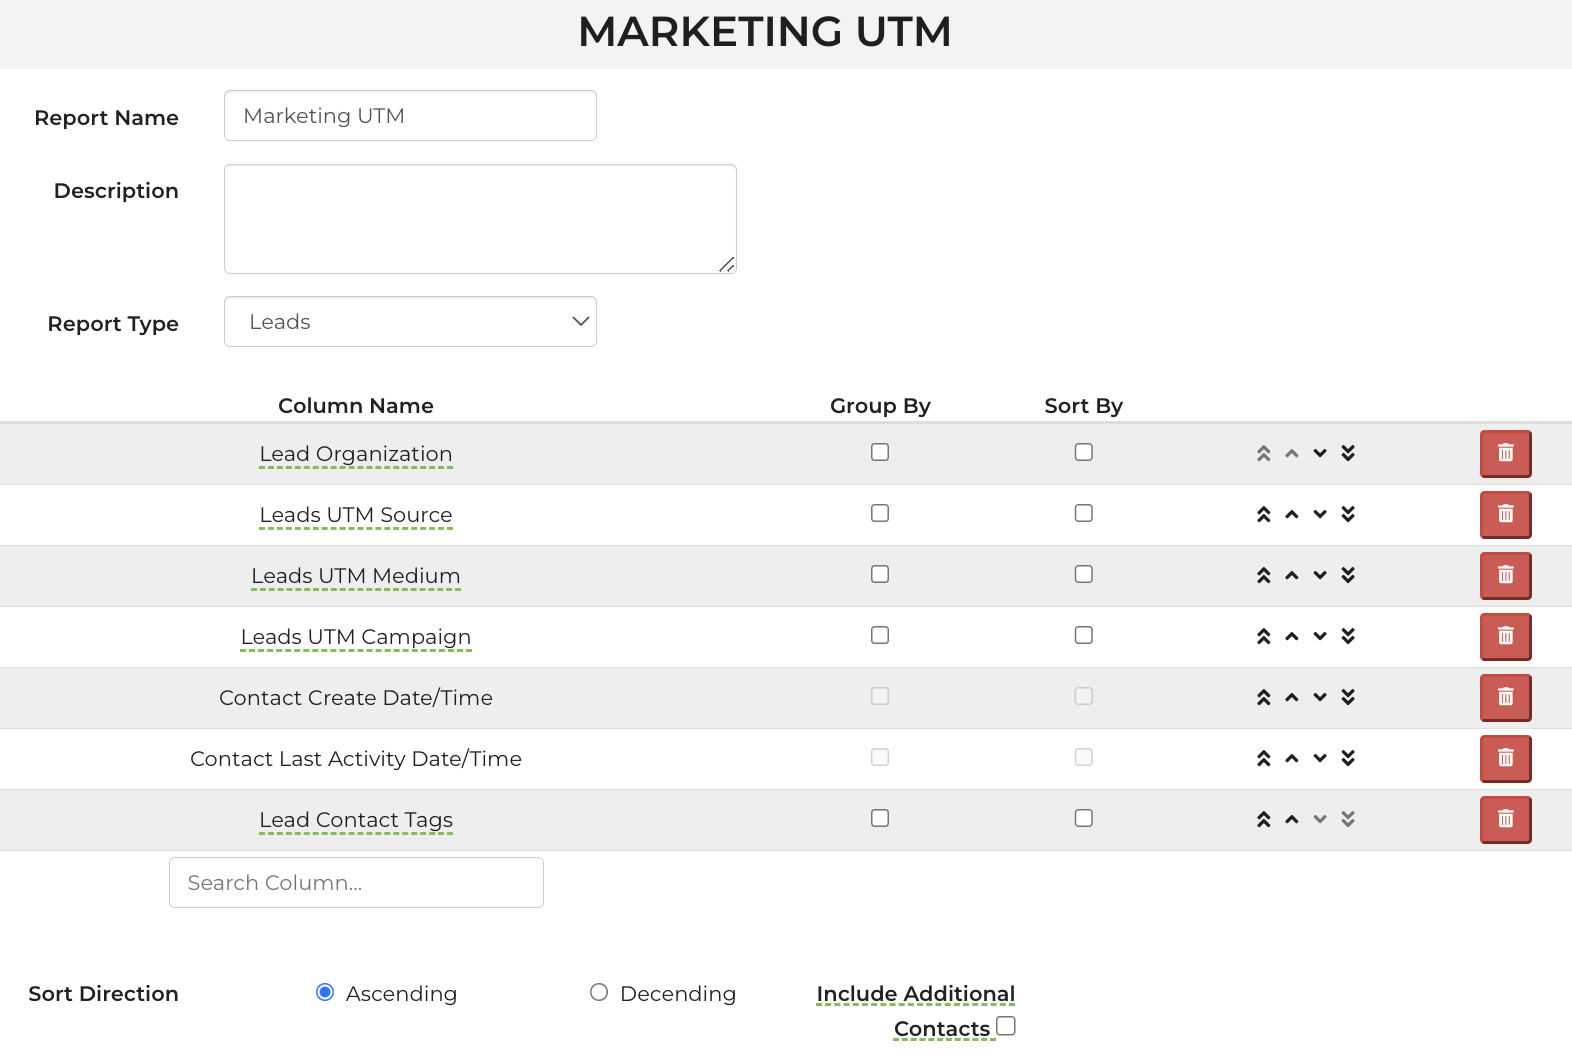
- Click on "Add Report" and select the fields you want to report on, such as UTM source, medium, or campaign. Save and Close. Here is an example:
Step 3: Create a New Filter
- Navigate to the "Filters" option under the gear icon
- Click on "Add Filter" to select the "Leads UTM Campaign is set" so you can view only marketing leads that contain UTM data. Save and Close.
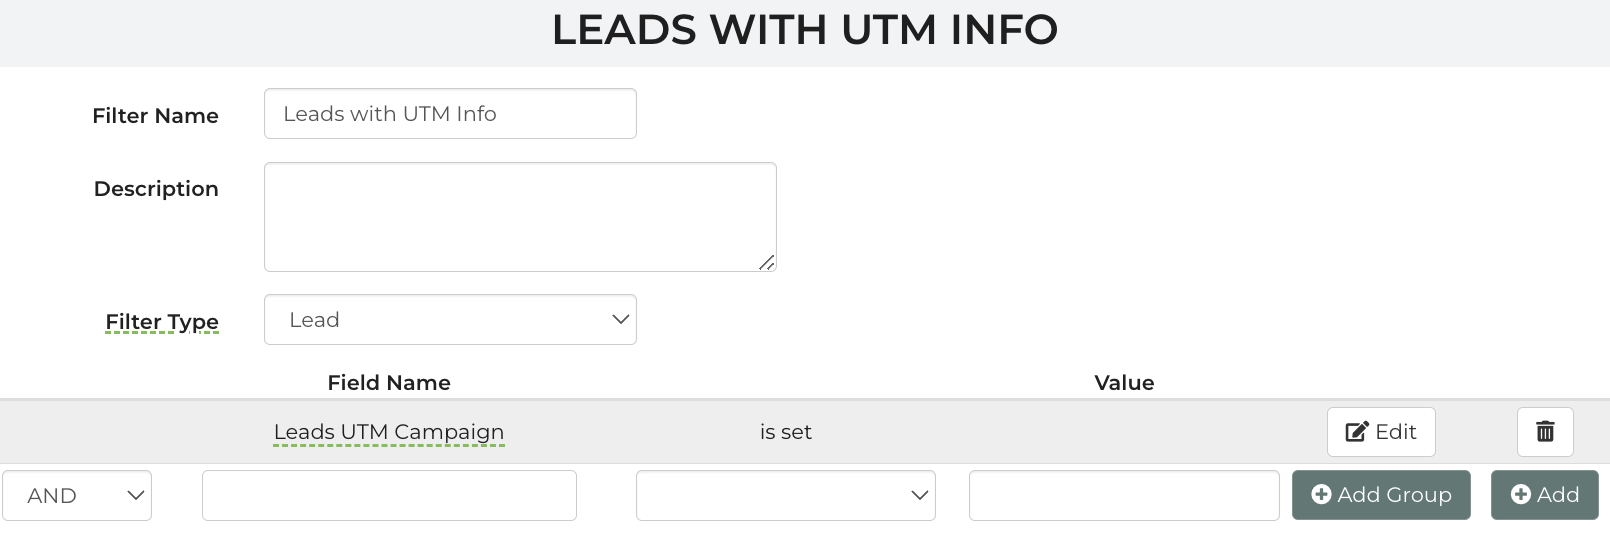
Step 4: Analyze Results
- Review the filtered leads to evaluate the effectiveness of your marketing efforts.
- Identify trends, assess conversion rates, and make data-driven decisions to optimize future campaigns.
Viewing UTM data on Leads:
Step 1: Log in to your account.
Step 2: Navigate to Leads
- Click on the "Leads" tab under "Events".
Step 3: Select the "Marketing UTM" report at the top right corner of the screen and add the "Leads with UTM Info" filter.
Step 4: Select a Lead with UTM data
- Click on any lead to view the specific UTM details.
Step 5: Scroll down to "CRM" within the lead
- View the UTM data that have been imported and applied to the lead regarding Source, Medium, and Campaign. Example:


