
The IO Phone bar is where you will spend most of your time with IO Phone. We've designed it to give you everything you need to make taking calls efficient and productive. There are a number of different views you can get with the phone bar. Below we will cover all the views.
There are certain things that are not available in the phone bar when logged in as the account administrator, such as the most recent call. As with all things in our software, additional modules bring additional features to modules you already have. The workers module is required for some of the phone bar features below.
Normal Inactive State

In the normal inactive state you will see a menu button next to the number selection box. The menu button is for access to the Do Not Disturb feature that is shown in the next section of this document. The number selection box is where you select what number you want to call from. It will contain the name and number of any worker phone number you have access to. The next box is the input box where you either search for a customer or input a number you would like to call. When you are ready to call after inputting the number, click the Connect button. IO Phone will ring your phone and as soon as you answer, it will start ringing the number you want to call.
The Connect button has a few additional options via the drop-down button to the right of it. For every outbound number you are allowed to use per your account settings for your current login, you will see an option. While we try to determine what number you want to call from based on a number of other things, there may be times that you want to manually select the number to connect with. This is how you do that. The number we think you want to use will be in bold. That is then number that will be used if you just click the Connect button. Quick links to the Settings, Logs, and Help can be found in there as well.
Here is how we attempt to determine what phone number you want to call from. From the leads page (customer & CRM sections), selecting a number from the phone bar autocomplete or clicking a number from either the call or text log, location is checked and the first outbound number in the list is automatically chosen that is allowed to operate in that location. Your default outbound number will be set the same for future calls to that same number until you later change it. So if I click to call +1 (555) 555-9242 with a specific location associated, then later manually type 5555559242, that same outbound number I used earlier will be used.
Do Not Disturb Menu
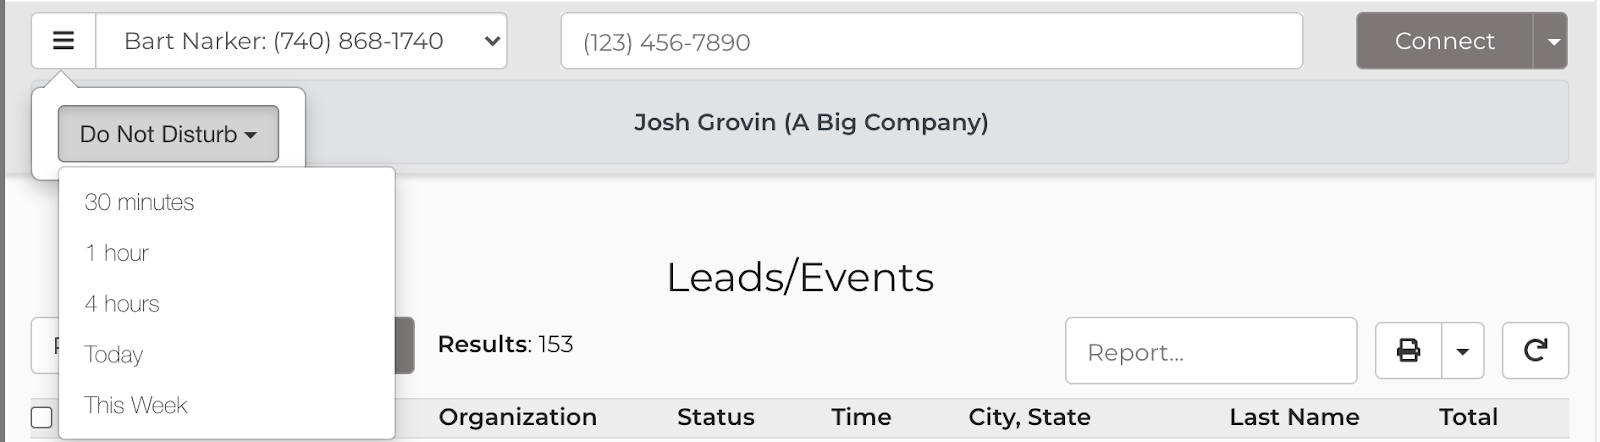
As mentioned previously, the hamburger menu button will allow you to set a do not disturb for your worker profile for whatever time you choose. You can read more about this feature in our Do Not Disturb article.
Active Incoming Call

When you have an active incoming call, you will see a message in yellow on the bottom of the phone bar. This will cover any call history data that was there. To answer the call, answer your phone like normal. To clear the message, click the ignore button. If you do not clear the call, once the call is answered by someone else, goes to voicemail, or the caller hangs up, this message will clear by itself.
Received Incoming Call

When you receive an incoming call, we will disable the number selection box but still show you what number the call is connected to. You will see an arrow pointing the direction of the call. For an incoming call, it will point to the left. Next, you will notice the duration of the call and the name of the caller if a match is in your database or the number that called you. The Connect button has changed colors and is now the hang up button. Of course you can hang up with your phone as well.
The second line has the transfer input, which allows you to select another person in your company to transfer a call to. To learn more about transferring calls, read our article on Transfers. After that, you will see the Add Lead/Event (now called "New Lead") button which makes it easy to make a new lead for the caller. It even fills in their information in the customer section. The View Leads button will take you to the leads page and filter it to only show leads for that customer. We have added an option to add a new customer as well. This is useful if you would like to add a note about the call. Simply add the customer and then enter a note in the notes field or add a journal entry if using the CRM module.

The last line shows the previous call. This view doesn't show it, but there are also some links to the right that will appear that allows you to view the leads for that previous caller or call the previous caller. Clicking to call them will fill in their number in the case you are not on a call.
Text Messaging

When you choose to send a manual text message, the phone bar will transform as shown above. Now you get an additional field showing the option for you to select a saved text message template if you would like. You will also get a message box where you can type in any message you would like to send. The Connect button has now changed to Send. All other buttons function the same.